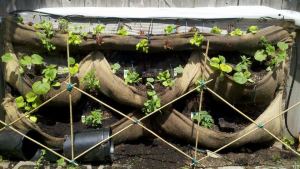
 So this is my second go-round with vertical gardening. Since the first time, in 2010, when no one I knew had ever heard of anything like it and I couldn’t find much of anything online to help me, vertical gardening has really taken off. However, all of the systems out there that I’ve seen are really really expensive. This is kind of ironic when you remember that I first had the idea as a way for people in inner cities to grow their own fresh food in a limited space for an extremely low cost. The materials for my entire “system” (not including dirt and plants) cost less than $100–a lot less for me because I had some of the stuff lying around. Anyway, this year’s garden came out a lot better than my last one–I learned a lot the first time about how not to construct pockets for growing.
 I first got the idea to do a “vertical” garden from the way the mountains in Malaysia are terraced in order to take advantage of flows of water and very limited top soil. the structure of staggered pockets promotes good drainage and irrigation, and nutrient rich topsoil flowing downhill will tend to get caught up and conserved in these pockets.

Anyway, my pockets work pretty much the same way–they protect small starts from wind and frost and allow for a drip system that conserves water and means that the garden literally waters itself. At this point, aside from weeding and upkeep, I can pretty much just leave it and forget it. I don’t have to worry about remembering to water, I just need to keep an eye for pests, weeds and any repairs that might need to be made as time goes by.

The construction was super easy and quick. It is meant to be highly impermanent–the burlap will only last a season, two at the most and, in fact, is designed to be pulled down at the end of the growing season to put flower beds and other areas to rest for the winter–or to be composted. I used a staple gun and a roll of burlap to create growing pockets on a sheet of plywood. At some point I’d like to try a tall, skinny, garden by setting up the plywood vertically–but it is easier to reach on the horizontal, if you have the space. Propped up vertically on a wall or something, the garden would need to be secured. It is quite heavy when full of dirt and could fall over. The drip system was also incredibly simple to put in. I actually used a kit–when I went the hardware store to get various parts to make my own, I found they had “Landscaping Drip Kits” for a super cheap price with all the stuff included that I would have bought anyway.

Added soil and plant starts and voila! (If you want to start from seed, do it indoors in trays first–I had a terrible time last time trying to get seeds to grow on my wall.) I want to see exactly how much I can cut my food budget by growing my own veggies in a space the size of a sheet a plywood. I planted a lot of things that have shallow roots and tend to be viny–I hope they will spill forward down the wall as they grow. I also planted a lot of leafy greens–spinach and lettuce.
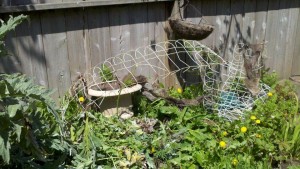
There are a few plants I threw in for fun–a couple of peppers and a midget golden watermelon, for example, that don’t grow well in this climate. I am hoping, however, that with the addition of the greenhouse-like tent cover these plants will thrive…or at least give me one puny little melon so that I can say I did it.
